Deprecation warning
Please note that this is outdated documentation for an older release of the Scandit Barcode Scanner SDK.
We encourage you to migrate to 6.x and take advantage of our latest / advanced features and improved performance.
You'll find the updated documentation at: Data Capture SDK Documentation for Android
This is the full guide to completely convert from RedLaser to the Scandit Barcode Scanner. The alternative is to use a wrapper around the Scandit Scanner which only provides a limited set of features while a full conversion allows you to use all of the Scanner's features.
Adding the Scandit Barcode Scanner library
Get the ScanditBarcodeScanner
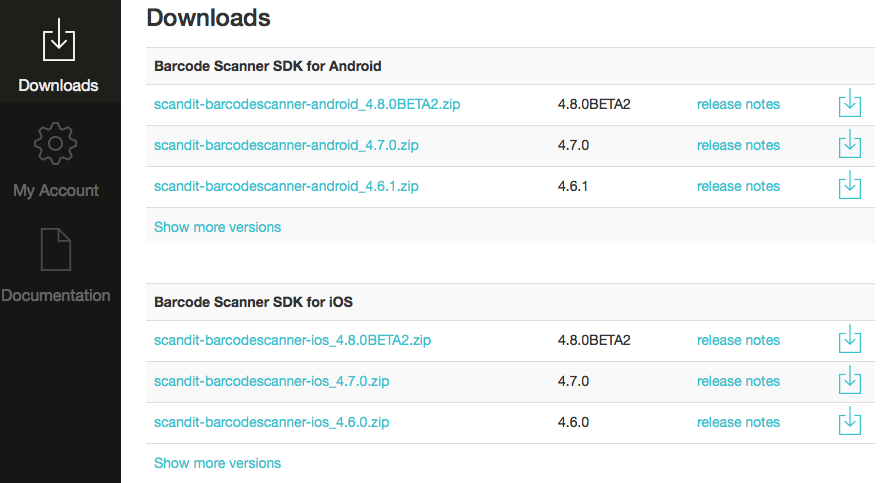
Choose a plan (e.g., free “Enterprise” or "Community" plan) at http://www.scandit.com/pricing and download the Scandit Barcode Scanner SDK for Android from your account.
Add the libraries to your project
Copy libs folder
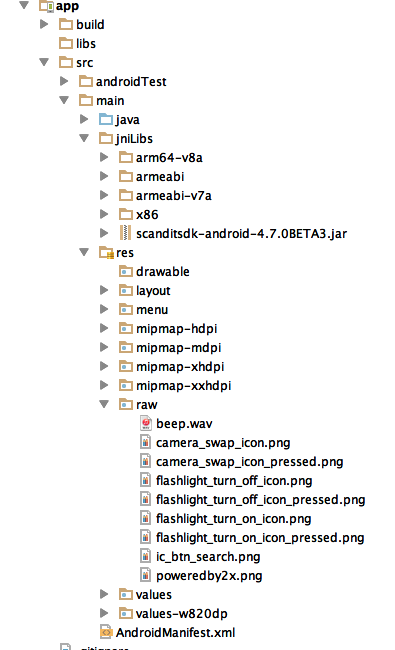
The ZIP file you downloaded contains a folder named libs (ScanditSDK/libs). Create in your Android Studio project the folder jniLibs (at this location /app/src/main/) and copy the content of the lib folder in it.
Copy the raw folder
Copy the raw folder located inside the res folder to the res folder of your Android Studio project.
Add jar
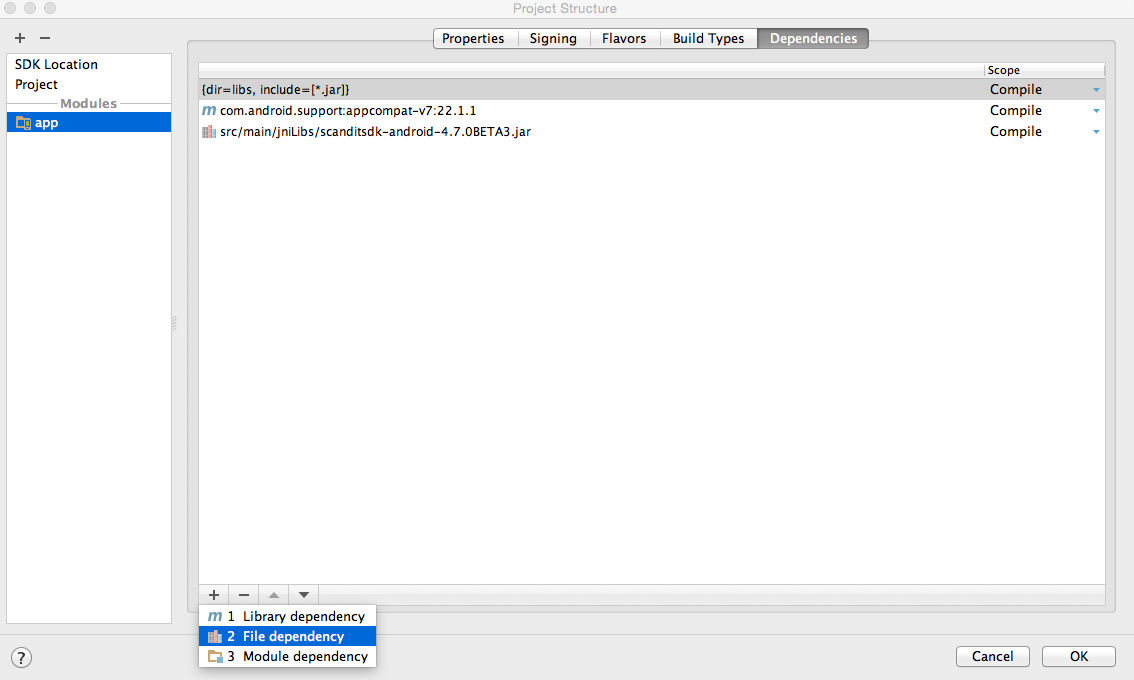
Add the scanditsdk–android-x.x.x.jar, which is contained in the jniLibs folder, to Dependencies (right click → "Open Module Settings" →"Dependencies", add "File dependency").
Project tree:
Change minimum SDK version
Starting with Scandit 4.0.0 the required Android version is 2.3. If the android:minSdkVersion in your manifest is below 9, change it to 9.
Updating from RedLaser's BarcodeScanActivity to a Scandit Activity
Inherit from a normal Activity
Instead of inheriting from the BarcodeScanActivity inherit from a basic Android Activity and tell it to implement the OnScanListener which we will later use to handle the callbacks. Import the necessary interface by pressing ALT + ENTER.
Create the BarcodePicker and enable symbologies
In the Activity's onCreate function you will have to create the BarcodePicker and enable the symbologies which you have set on the BarcodeTypes object so far. For this you instantiate BarcodePicker and specify the listener that will receive the callback events. Do not forget to replace #AppKey## with your app key, which is available from your Scandit account at http://account.scandit.com (under the "Downloads" section).
Therefore your old code that looks something like this:
becomes:
Import the necessary interface by pressing ALT + ENTER.
Starting and stopping the picker
Since Android's camera object is a singleton that has to be released every time your application goes into the background, you have to couple BarcodePicker.startScanning() and BarcodePicker.stopScanning() to the Activity's lifecycle events. Specifically you should start scanning in onResume() and stop scanning in onPause() as follows:
Changing the callback function
You already specified that the Activity should implement the OnScanListener . You can now remove the old callback function:
And replace it with the ScanditSDKOnScanListener callback function:
Careful: This callback function is called in a background thread and not the main thread. Because of this you need to make sure that you execute things like UI changes specifically in the main thread by using a Handler. A handler for a UI change would look like this:
Which is called from within OnScanListener.didScan(ScanSession) through:
Other functionality
doneScanning()
Instead of calling the doneScanning() function you simply call ScanditSDKBarcodePicker.stopScanning() and closed the Activity by calling its finish() function.
requestCameraIndex(int)
To specify whether the front or back camera should be opened you can use ScanSettings.setCameraFacingPreference(int) .
getOrientationSetting()
The Scandit Barcode Scanner automatically adjusts itself depending on the device orientation. If you want to force the Activity to a certain orientation you should specify this in the Manifest.xml or use Activity specific functions to change it.
setActiveRect(Rect)
To restrict the area within which the scanner looks for barcodes you can use ScanSettings.setActiveScanningArea(int, RectF) . Be aware that setting the active scanning area does not change the UI. If you would like to adjust the viewfinder to match the new scanning area you should use ScanOverlay.setViewfinderDimension(float, float, float, float) .
requestImageData()
To access one or more frames captured by the camera you set a ProcessFrameListener through BarcodePicker.setProcessFrameListener(ProcessFrameListener) and implement the callback function didProcess(byte[] imageBuffer, int width, int height, ScanSession session) where you will receive the processed frame.
getTorch() and isTorchAvailable
The Scandit Barcode Scanner does not contain any equivalent functions to these.