The Scandit Barcode Scanner SDK comes with seven demos:
- SimpleSample: shows how to use the barcode scanner in Objective-C
- SwiftSample: shows how to use the barcode scanner in Swift
- ExtendedSample: allows the user to configure the barcode scanner as well as the UI from the application itself.
- MatrixScanSample: shows how to use MatrixScan.
- BatchModeScanSample: shows how to implement aim-and-scan or scan-and-confirm, to precisely select a barcode among many others.
- ViewBasedMatrixScanSample: shows how to implement view overlays on top of a barcode with MatrixScan.
- GeneratorSample: shows how to use our barcode generator.
This guide shows you how to run these sample applications. It is assumed that you have a recent version of XCode installed on your development machine.
To build and run the Scandit demo project, perform the following four steps.
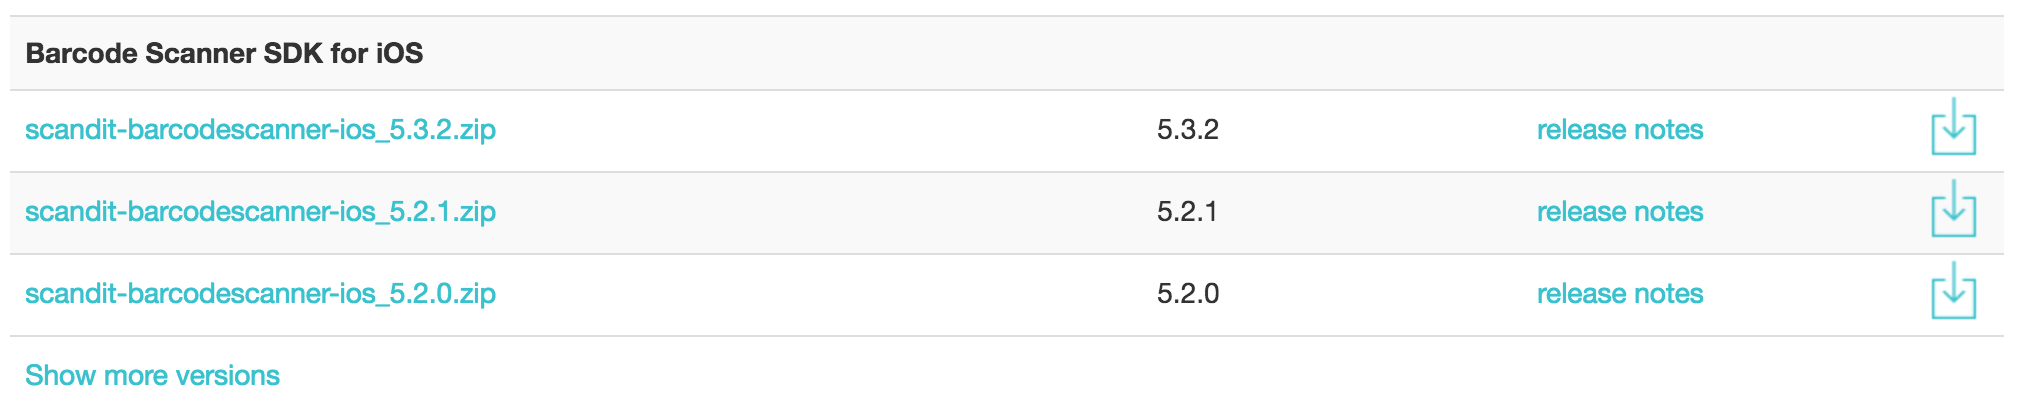
Download the Scandit Barcode Scanner
Choose a plan (e.g., free “Enterprise Trial” or "Community" plan) at http://www.scandit.com/pricing, activate your account and log in. Go to the Download section and download the Barcode Scanner for iOS.
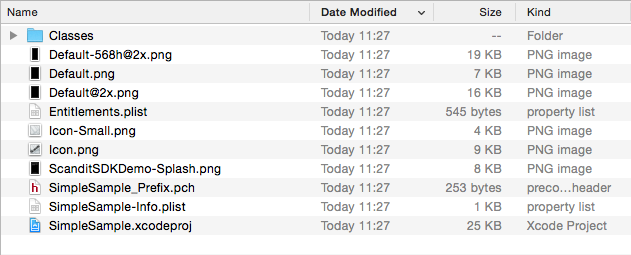
Open the simple demo project in Xcode
Unpack the downloaded ZIP file and open the SimpleSample/SimpleSample.xcodeproj demo project in Xcode.
Set license key
Sign in to your account at http://account.scandit.com to look up your license key in the License Key section.
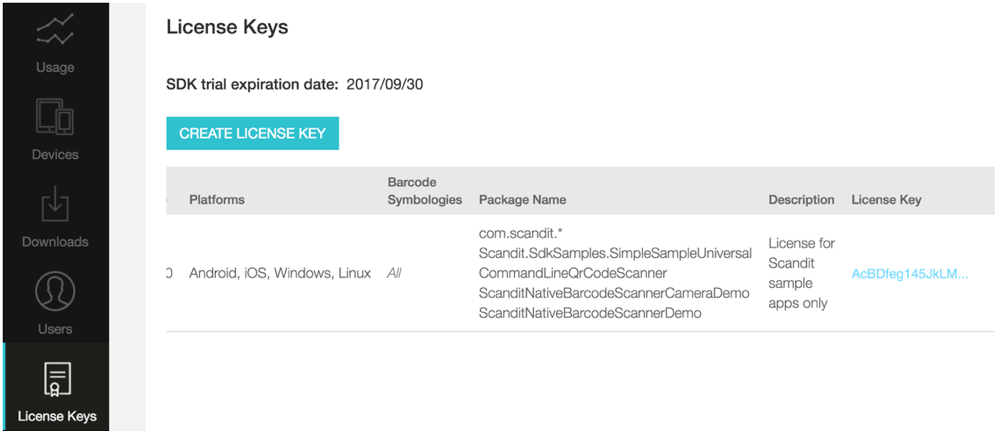
In the AppKey.h file, locate the following constant string and paste your license key between the quotation marks.

Build and run the project
You can now build and run the demo project on your iPhone device.