About SparkScan
SparkScan is our pre-built smartphone scanning interface designed for high-performance barcode scanning. It fits on top of any smartphone application, providing an intuitive user interface for simple, fast and ergonomic scanning in scan-intensive workflows such as inventory management in retail, or goods receiving in logistics.
SparkScan bundles multiple scanning features together and addresses many common challenges associated with scanning on smart devices. It is designed to be easily integrated into any application, and can be customized to fit your specific needs.
UI Overview
The UI elements in SparkScan are intentionally minimalistic, meant to be overlayed on any application without the need to adapt the existing app while offering the best user experience.
Three main elements compose the UI:

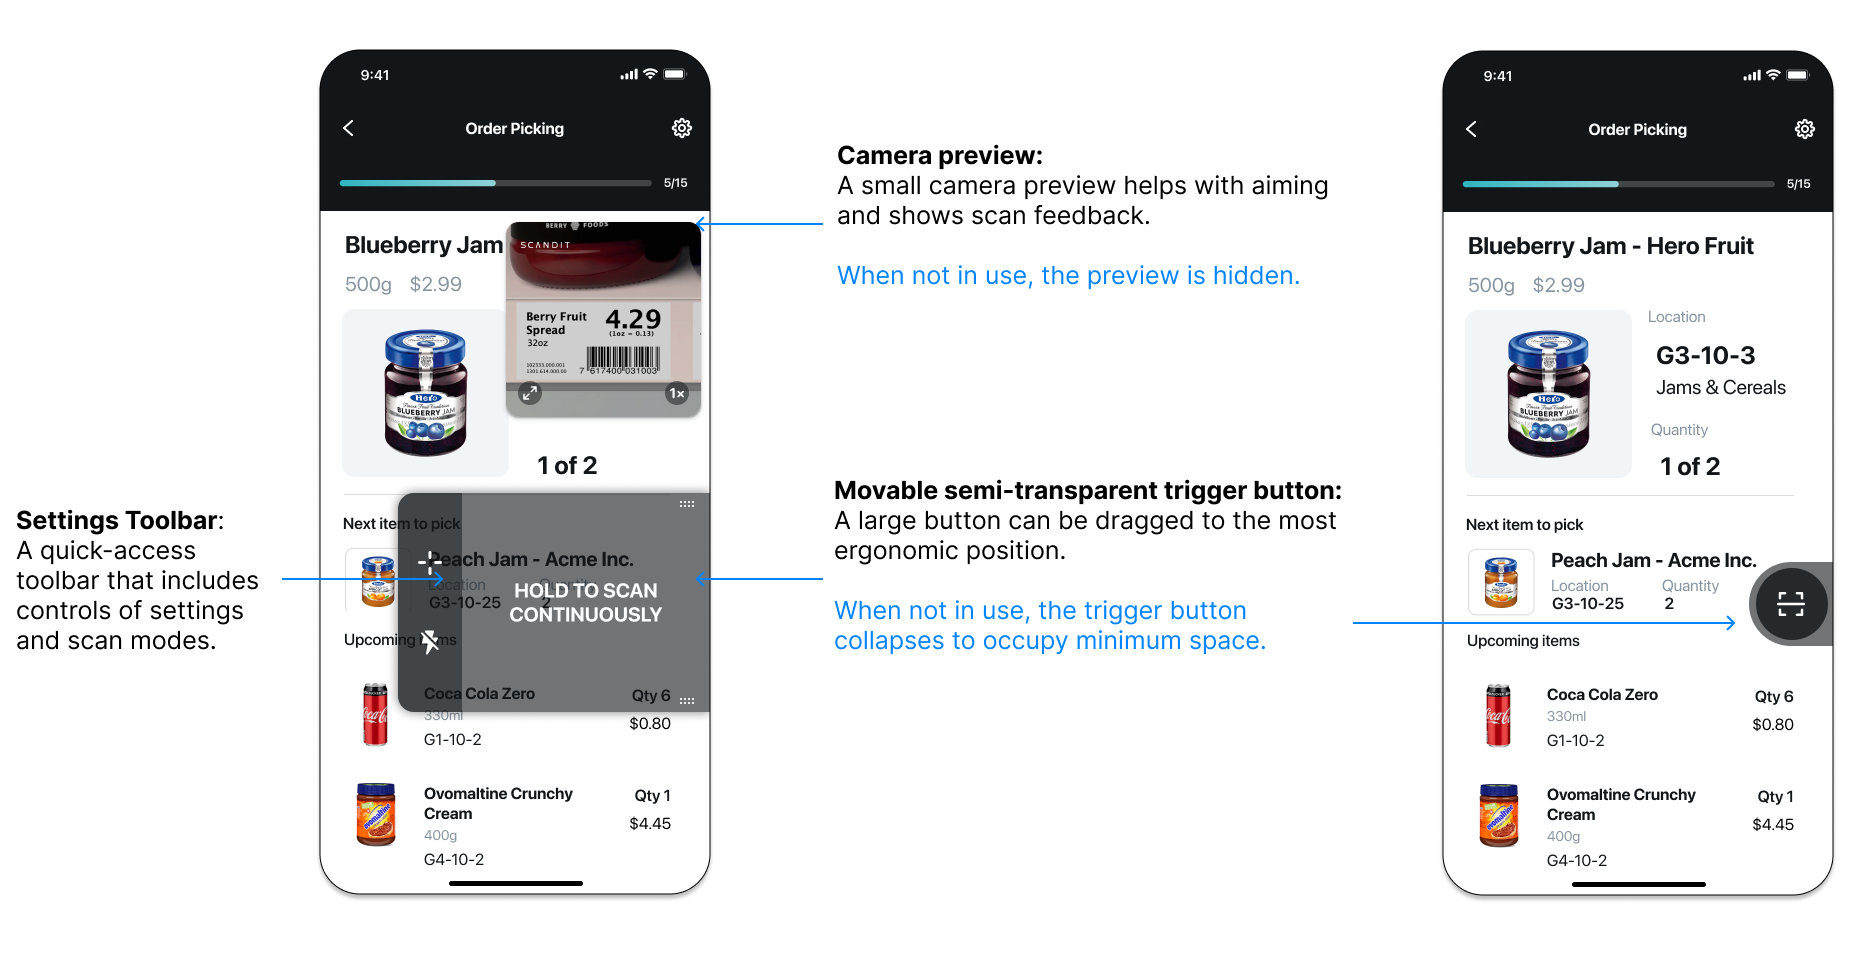
- Camera preview: A small camera preview helps with aiming and shows scan feedback. When not in use, the camera preview is hidden.
- Trigger button: A large-sized, transparent, floating button that users can drag up and down to position it in the most ergonomic position. When not in use, the trigger button collapses to occupy less space.
- Settings toolbar: A quick-access toolbar that includes controls of settings and scan modes.
There are additional UI elements available for displaying errors or providing feedback to the user. These are described in the Advanced section.
Workflow Options
The workflow here is based on the default configuration of SparkScan, carefully picked as a result of extensive user testing and customer feedback from the field.
But not all workflows look the same, and your needs may differ. That’s why SparkScan comes with a set of options to configure the scanner and to best fit in the desired workflow.
Scanning modes:
- Default mode: Ideal for close-range and fast paced scanning. This mode will display a small camera preview to aid with aiming. The preview size and zoom level can be adjusted as needed.
- Target mode: Ideal for scanning scenarios where precision is important. This mode will add an aimer to the preview, to precisely select the barcode to scan. This is useful when multiple barcodes are in view (e.g. long range scanning).
Users can enable the target mode by toggling the dedicated icon in the setting toolbar, shown by default (SDCSparkScanView.targetModeButtonVisible). Hiding this button will remove the possibility to toggle scanning mode for the end-user.
Scanning behaviors:
- Single scan: Scan one barcode at a time. The user needs to trigger the scanner every time to scan a barcode. This allows for a more controlled scanning and lower battery consumption.
- Continuous scan: Scan barcodes consecutively. The user needs to trigger the scanner once and barcodes will be scanned without any further interaction before each scan. This allows for a smoother experience when multiple barcodes need to be scanned consecutively.
- Users can enable continuous scanning by holding down the trigger button (
SDCSparkScanViewSettings.holdToScanEnabled). This gesture can be disabled. - Developers can show a dedicated setting in the toolbar to let the user enable continuous scan mode (
SDCSparkScanView.scanningBehaviorButtonVisible), which is hidden by default.
- Users can enable continuous scanning by holding down the trigger button (
Camera preview behaviors:
- Default: Preview fades away when the scanner is off. This lets the user check important information displayed by the app and reduces battery consumption.
- Persistent: Preview remains visible, but darkened, even when the scanner is off. This is useful for scenarios where you want to select a barcode (among many) or need to look through the preview at all times (to ensure the right scan) - especially if used in conjunction with the target mode.
Developers can set a combination of scanning mode, scanning behavior and camera preview behavior - defining the initial state of the scanner. This can be done by setting the default scanning mode (SDCSparkScanViewSettings.defaultScanningMode).
Workflow Description
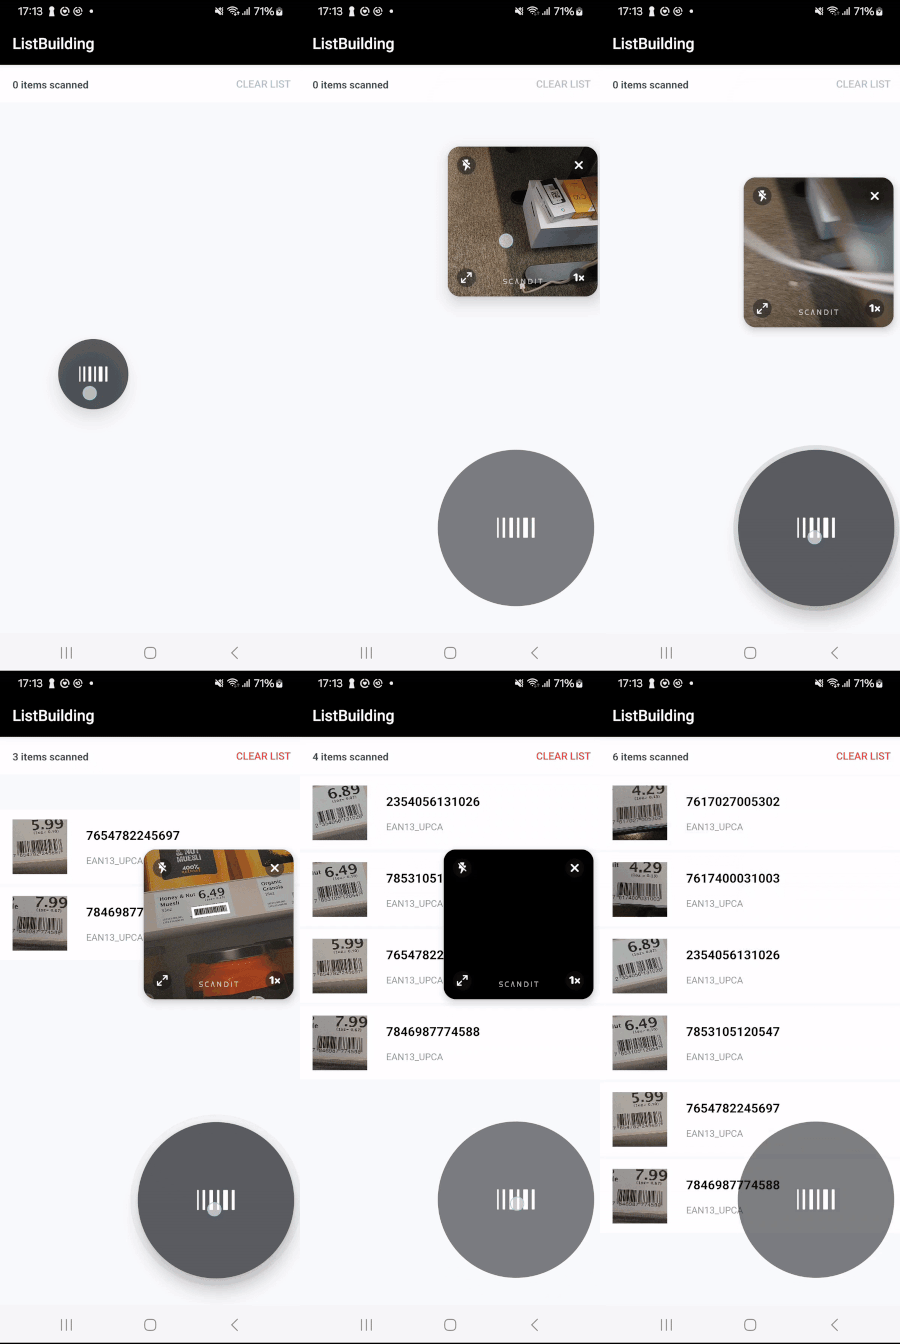
When SparkScan is started, the UI presents just the trigger button, collapsed on the side. To start scanning, the user can:
- Swipe to open the button, then tap on it.
- Tap on the collapsed trigger button.
When the scanner is active the mini preview is shown. Depending on the scanning mode enabled, the workflow will behave differently:
- Upon scan the user will receive audio/haptic feedback confirming the scan, and the mini preview will display the scanned barcode for a small amount of time before fading away.
- Tapping on the trigger button will restart immediately the scanner.
Upon completing the scanning process (or to interact with the customer app layer), the user can tap in any area outside the trigger button and the mini preview. This collapses the scanner button back to the side, going back to the initial state.

Supported Symbologies
SparkScan supports all of the major symbologies listed here: Barcode Symbologies.