Speed up Smart Label Capture integration with Agent Skills
Install the Scandit plugin and use the /label-capture-kmp skill so that your AI coding agent can integrate, debug, and customize Smart Label Capture on Kotlin Multiplatform following Scandit's recommended patterns. More info →
Run the following command in your project directory. It detects the supported coding agents you have installed and adds the Scandit plugin to each. Re-run it to update.
npx plugins add scandit/skillsPrefer to set it up yourself? Manual installation steps for each agent →
Advanced Configurations
Customization of the Overlays
Basic Overlay
To customize the appearance of an overlay you can implement a LabelCaptureBasicOverlayListener and/or LabelCaptureAdvancedOverlayListener interface, depending on the overlays you are using.
brushForLabel() is called every time a label is captured, and brushForField() is called for each of its fields to determine the brush for the label or field.
import com.kmp.datacapture.core.common.Color
import com.kmp.datacapture.core.ui.style.Brush
import com.kmp.datacapture.label.capture.CapturedLabel
import com.kmp.datacapture.label.capture.LabelField
import com.kmp.datacapture.label.ui.overlay.LabelCaptureBasicOverlay
import com.kmp.datacapture.label.ui.overlay.LabelCaptureBasicOverlayListener

overlay.listener = object : LabelCaptureBasicOverlayListener {
    // Customize the appearance of the overlay for the individual fields.
    override fun brushForField(
        overlay: LabelCaptureBasicOverlay,
        field: LabelField,
        label: CapturedLabel,
    ): Brush? = when (field.name) {
        "<your-barcode-field-name>" -> Brush(Color.fromRgba(0, 255, 255, 128), Color.fromRgba(0, 255, 255, 128), 1f)
        "<your-expiry-date-field-name>" -> Brush(Color.fromRgba(255, 165, 0, 128), Color.fromRgba(255, 165, 0, 128), 1f)
        else -> null
    }

    // Customize the appearance of the overlay for the full label.
    // In this example, we disable label overlays by returning null always.
    override fun brushForLabel(
        overlay: LabelCaptureBasicOverlay,
        label: CapturedLabel,
    ): Brush? = null

    override fun onLabelTapped(overlay: LabelCaptureBasicOverlay, label: CapturedLabel) {
        // Handle the user tap gesture on the label.
    }
}
You can also use LabelCaptureBasicOverlay.setBrushForLabel() and LabelCaptureBasicOverlay.setBrushForField() to configure the overlay if you don't need to customize the appearance based on the name or content of the fields.
Advanced Overlay
For more advanced use cases, such as adding custom views or implementing Augmented Reality (AR) features, you can use LabelCaptureAdvancedOverlay. The example below configures it to display a custom view below expiry date fields when they're close to expiring, while ignoring other fields.
import com.kmp.datacapture.core.common.geometry.Anchor
import com.kmp.datacapture.core.common.geometry.FloatWithUnit
import com.kmp.datacapture.core.common.geometry.MeasureUnit
import com.kmp.datacapture.core.common.geometry.PointWithUnit
import com.kmp.datacapture.core.ui.NativeView
import com.kmp.datacapture.label.capture.CapturedLabel
import com.kmp.datacapture.label.capture.LabelField
import com.kmp.datacapture.label.capture.LabelFieldType
import com.kmp.datacapture.label.ui.overlay.LabelCaptureAdvancedOverlay
import com.kmp.datacapture.label.ui.overlay.LabelCaptureAdvancedOverlayListener

// Create an advanced overlay that allows for custom views to be added over detected label fields.
val advancedOverlay = LabelCaptureAdvancedOverlay.withLabelCaptureForView(labelCapture, dataCaptureView)

advancedOverlay.listener = object : LabelCaptureAdvancedOverlayListener {
    // Called when a label is detected — return null to add AR elements only to specific fields.
    override fun viewForCapturedLabel(
        overlay: LabelCaptureAdvancedOverlay,
        capturedLabel: CapturedLabel,
    ): NativeView? = null

    override fun anchorForCapturedLabel(
        overlay: LabelCaptureAdvancedOverlay,
        capturedLabel: CapturedLabel,
    ): Anchor = Anchor.CENTER

    override fun offsetForCapturedLabel(
        overlay: LabelCaptureAdvancedOverlay,
        capturedLabel: CapturedLabel,
    ): PointWithUnit = PointWithUnit(FloatWithUnit(0f, MeasureUnit.PIXEL), FloatWithUnit(0f, MeasureUnit.PIXEL))

    // Called for each field in a label. Only Android delivers the parent label; the KMP
    // signature reflects that lowest common denominator.
    override fun viewForCapturedLabelField(
        overlay: LabelCaptureAdvancedOverlay,
        labelField: LabelField,
    ): NativeView? {
        if (labelField.name.contains("expiry", ignoreCase = true) && labelField.type == LabelFieldType.TEXT) {
            // Compute daysUntilExpiry from labelField.asDate(), then return your platform view
            // (an Android View or an iOS UIView, wrapped as NativeView) if it's close to expiring.
        }
        return null
    }

    override fun anchorForCapturedLabelField(
        overlay: LabelCaptureAdvancedOverlay,
        labelField: LabelField,
    ): Anchor = Anchor.BOTTOM_CENTER

    override fun offsetForCapturedLabelField(
        overlay: LabelCaptureAdvancedOverlay,
        labelField: LabelField,
    ): PointWithUnit = PointWithUnit(FloatWithUnit(0f, MeasureUnit.DIP), FloatWithUnit(22f, MeasureUnit.DIP))
}
Validation Flow
How It Works
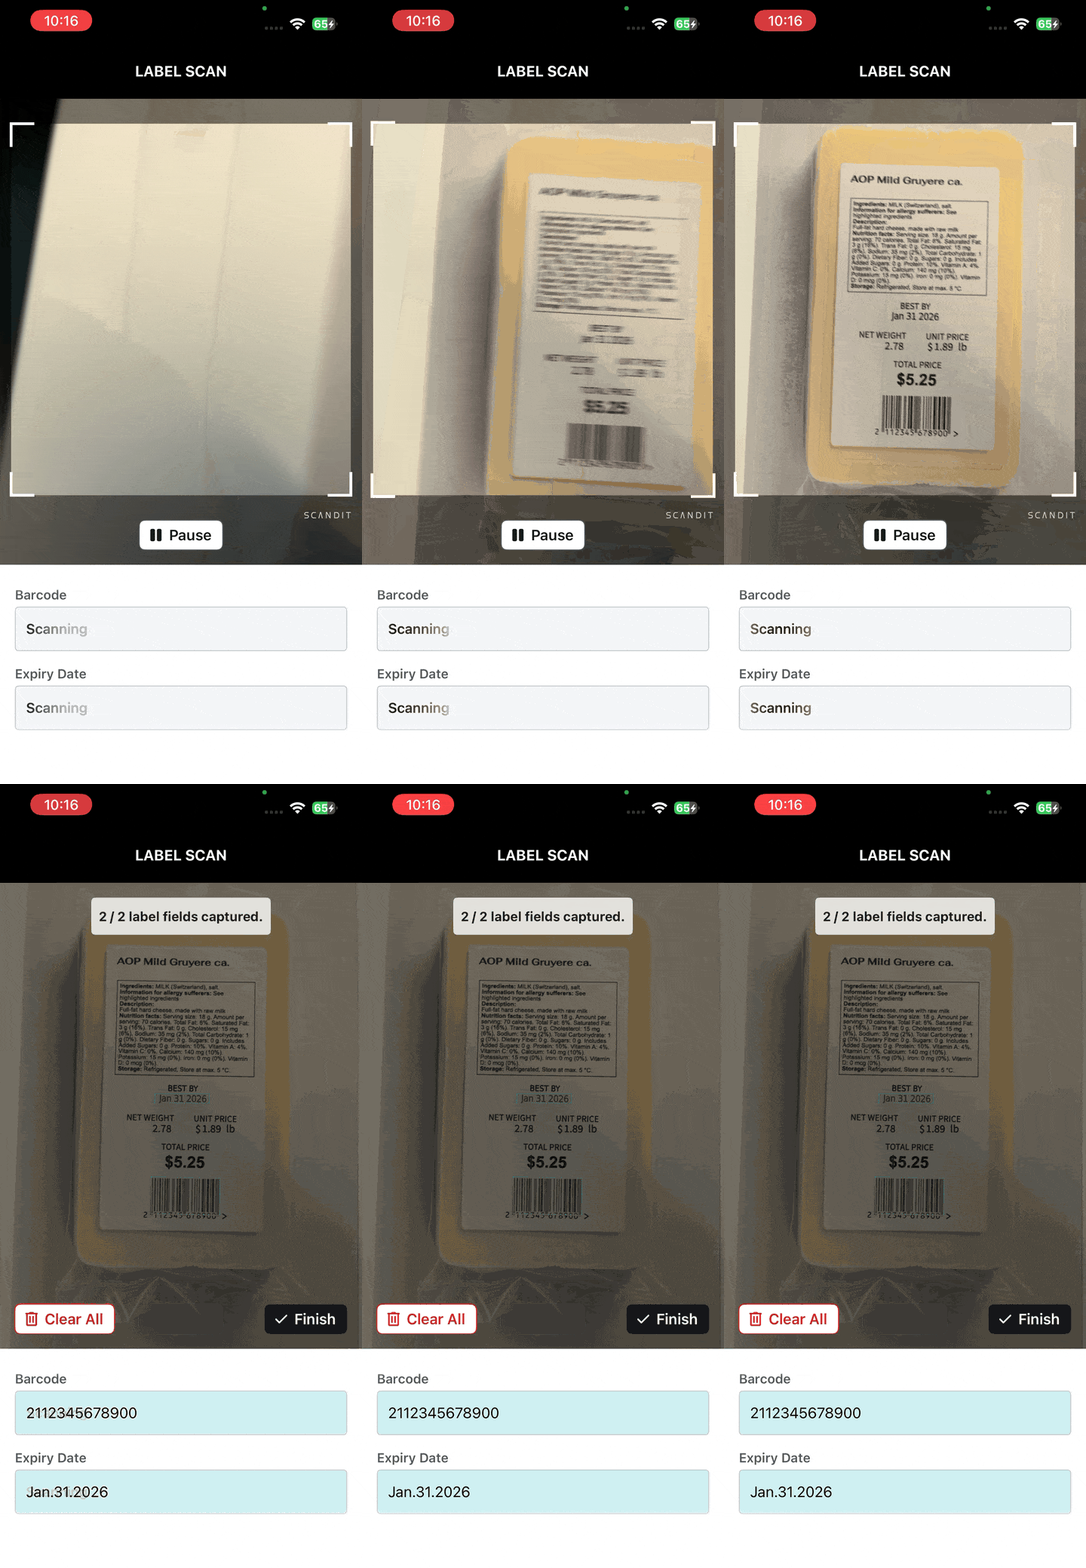
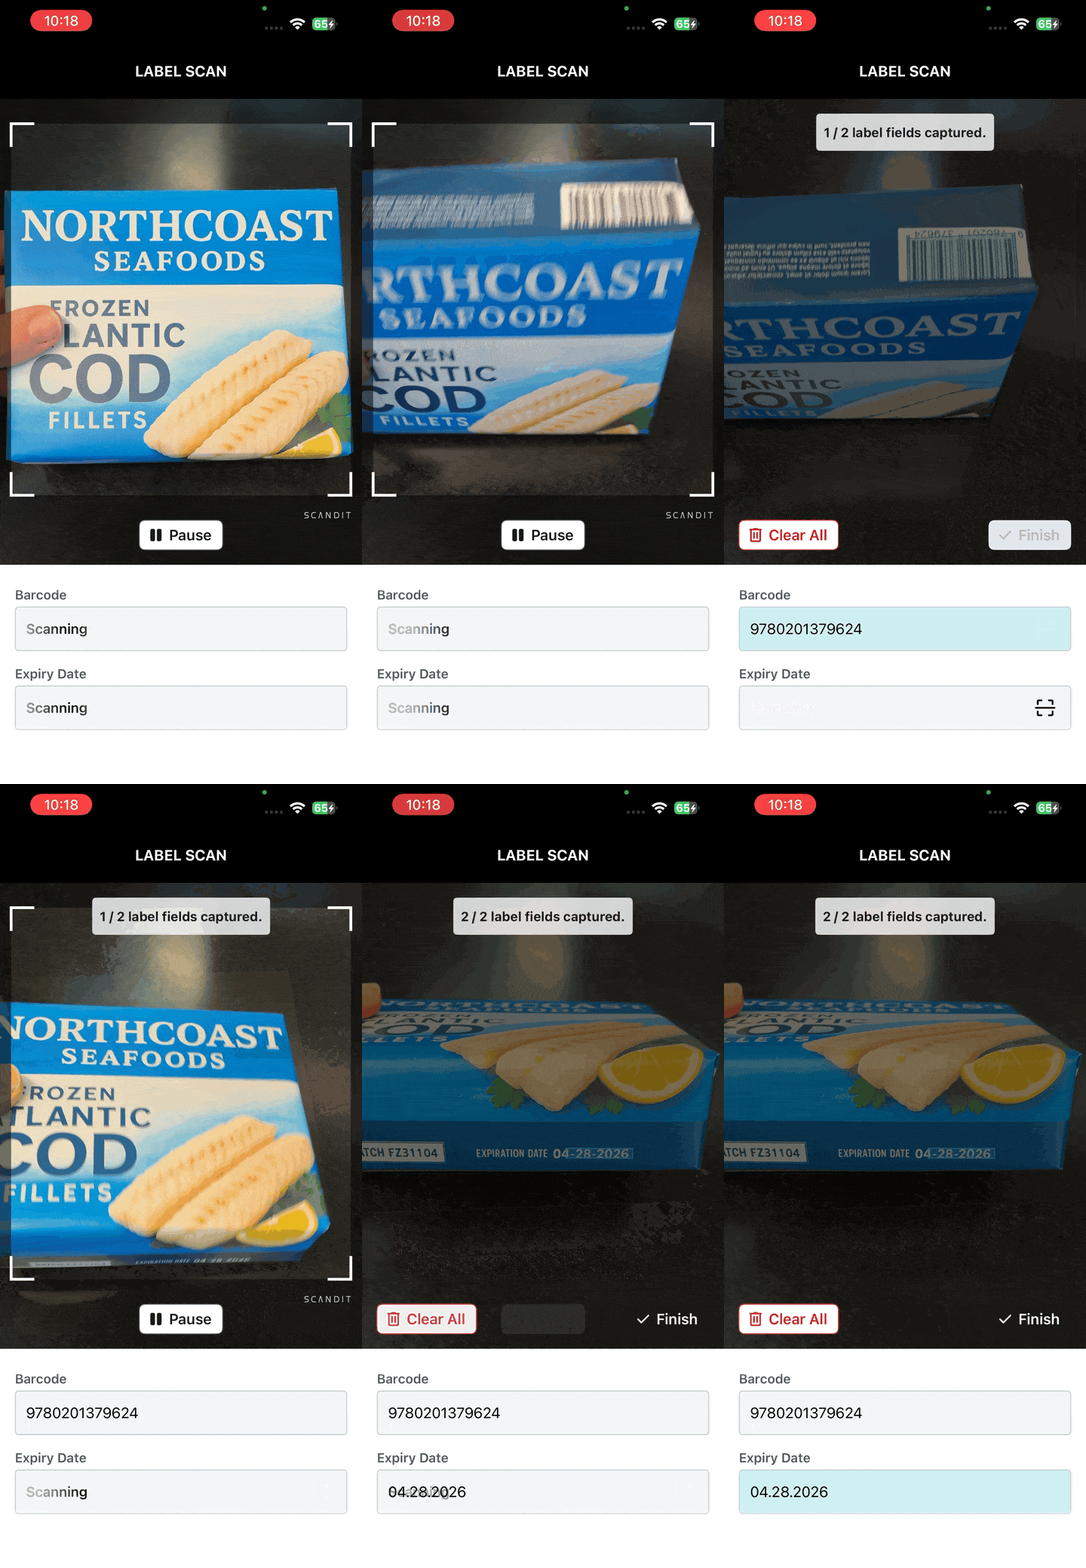
The Validation Flow provides a guided label scanning experience. An always-present checklist shows users exactly which fields have been captured and which are still missing, making the scanning process transparent and efficient. Scanning is the fastest way to capture all label content — whether all fields are visible at once or spread across different sides of a package.
The fields shown in the checklist are driven by your Label Definition — the configuration that tells Label Capture which fields to recognize and extract. See the Label Definitions guide for details on how to set them up.
The Validation Flow overlay is a UI component built on top of Label Capture. To use it, create a LabelCaptureValidationFlowOverlay and add it to your data capture view.
| Single-Step Scan | Multi-Step Scan |
|---|---|
| All fields are visible together | Fields on different sides of the package |
 |  |
import com.kmp.datacapture.label.ui.overlay.LabelCaptureValidationFlowOverlay

// The validation-flow overlay has no viewless factory — the DataCaptureView is required
// to host its result UI.
val validationFlowOverlay = LabelCaptureValidationFlowOverlay.withLabelCaptureForView(labelCapture, dataCaptureView)

// Set the listener
validationFlowOverlay.listener = myValidationFlowListener
On Android, call validationFlowOverlay.onResume() / onPause() from your screen's resume/pause lifecycle—the overlay does not observe lifecycle events on its own. Both calls are no-ops on iOS, which manages its own lifecycle.
Define a Listener
When the user has verified that all fields are correctly captured and presses the finish button, the Validation Flow triggers a callback with the final results. To receive these results, implement LabelCaptureValidationFlowListener:
import com.kmp.datacapture.label.capture.LabelField
import com.kmp.datacapture.label.ui.overlay.LabelCaptureValidationFlowListener
import com.kmp.datacapture.label.ui.overlay.LabelCaptureValidationFlowOverlay

val myValidationFlowListener = object : LabelCaptureValidationFlowListener {
    override fun onValidationFlowLabelCaptured(
        overlay: LabelCaptureValidationFlowOverlay,
        fields: List<LabelField>,
    ) {
        val barcodeData = fields.find { it.name == "<your-barcode-field-name>" }?.barcode?.data
        val expiryDate = fields.find { it.name == "<your-expiry-date-field-name>" }?.asDate()

        // Handle the captured values
    }
}
Required and Optional Fields
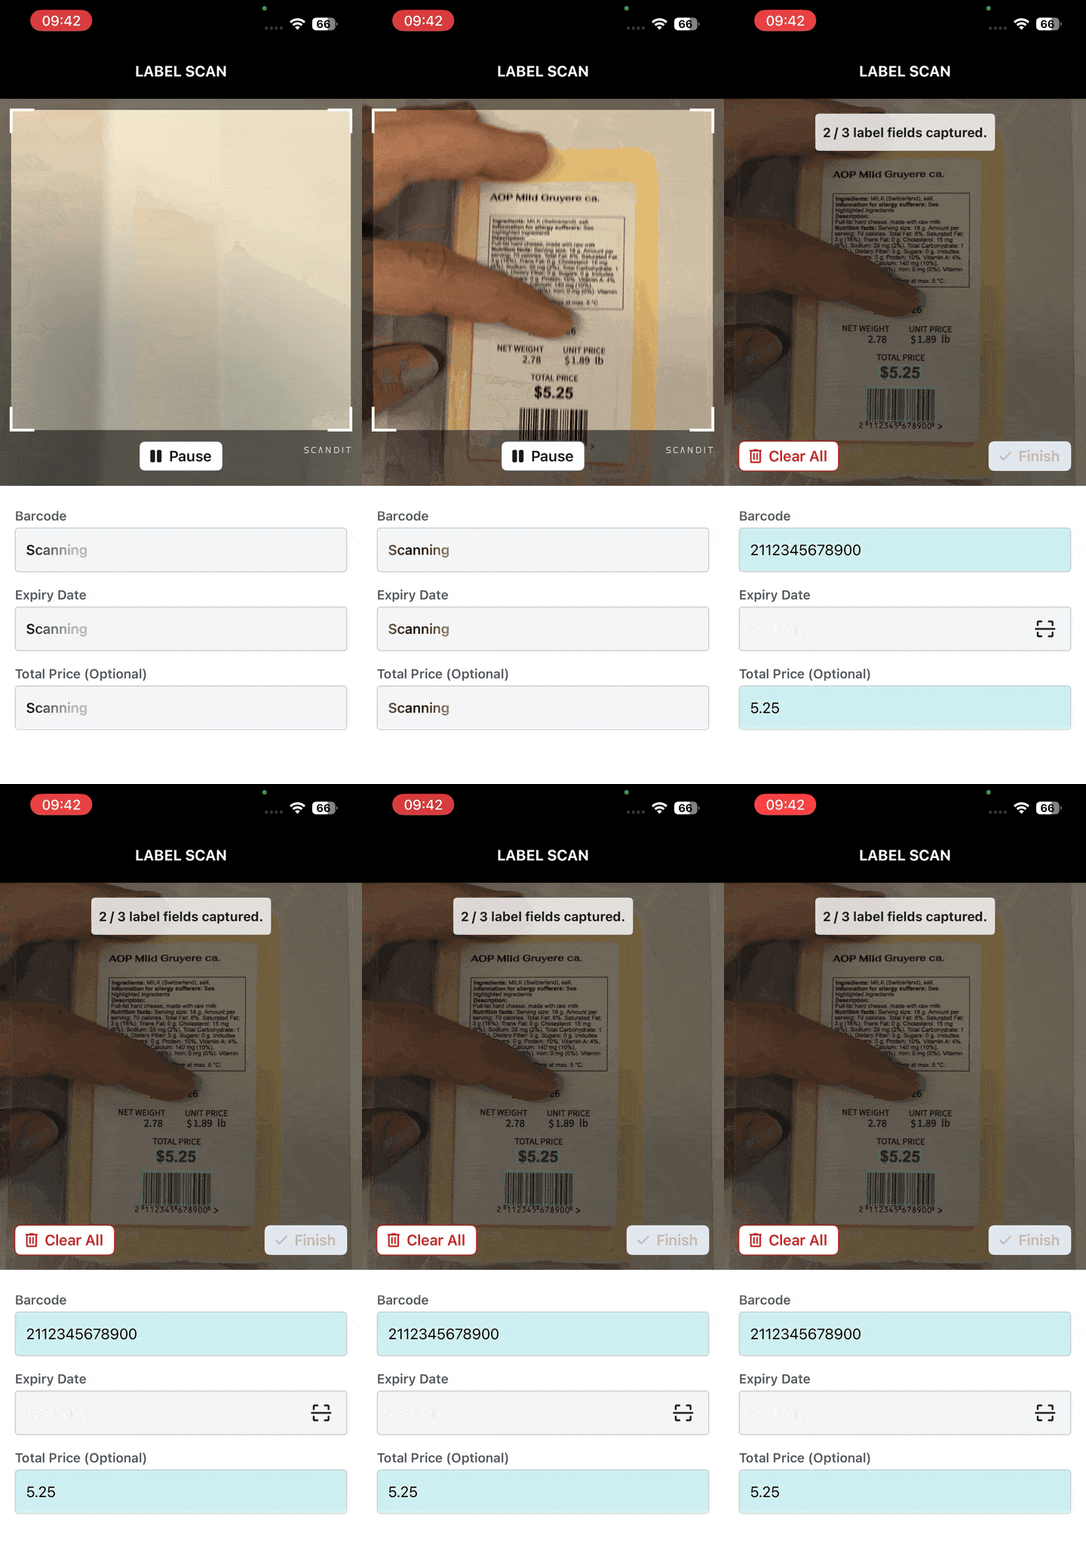
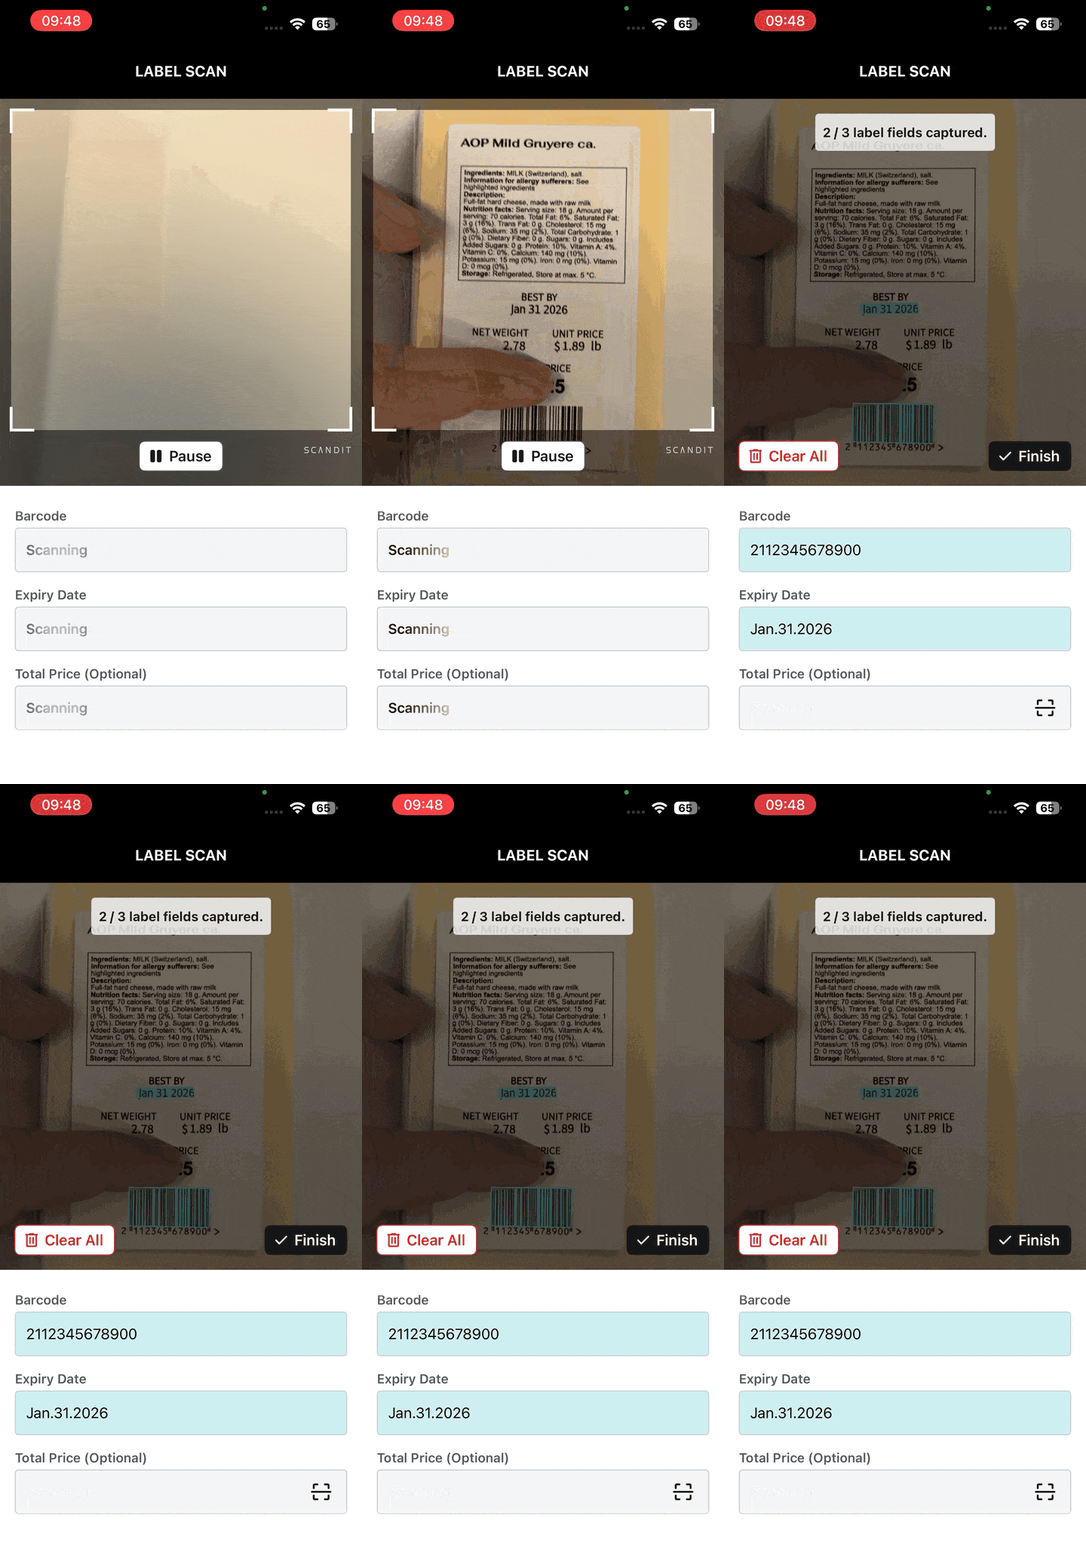
The Validation Flow clearly indicates which fields must be captured and which are optional. Required fields are visually highlighted and the flow can only be completed once all of them have been successfully scanned or manually entered. Optional fields are shown but do not block the user from finishing.
| Required Field | Optional Field |
|---|---|
| Must be captured to finish the flow | Does not block finishing |
 |  |
Typing Hints
If neither on-device nor cloud-based scanning can capture a field, the user can always manually enter the value. To make manual input easier and reduce errors, you can configure placeholder text (typing hints) that show the expected format directly in the input field.
| Typing Hints |
|---|
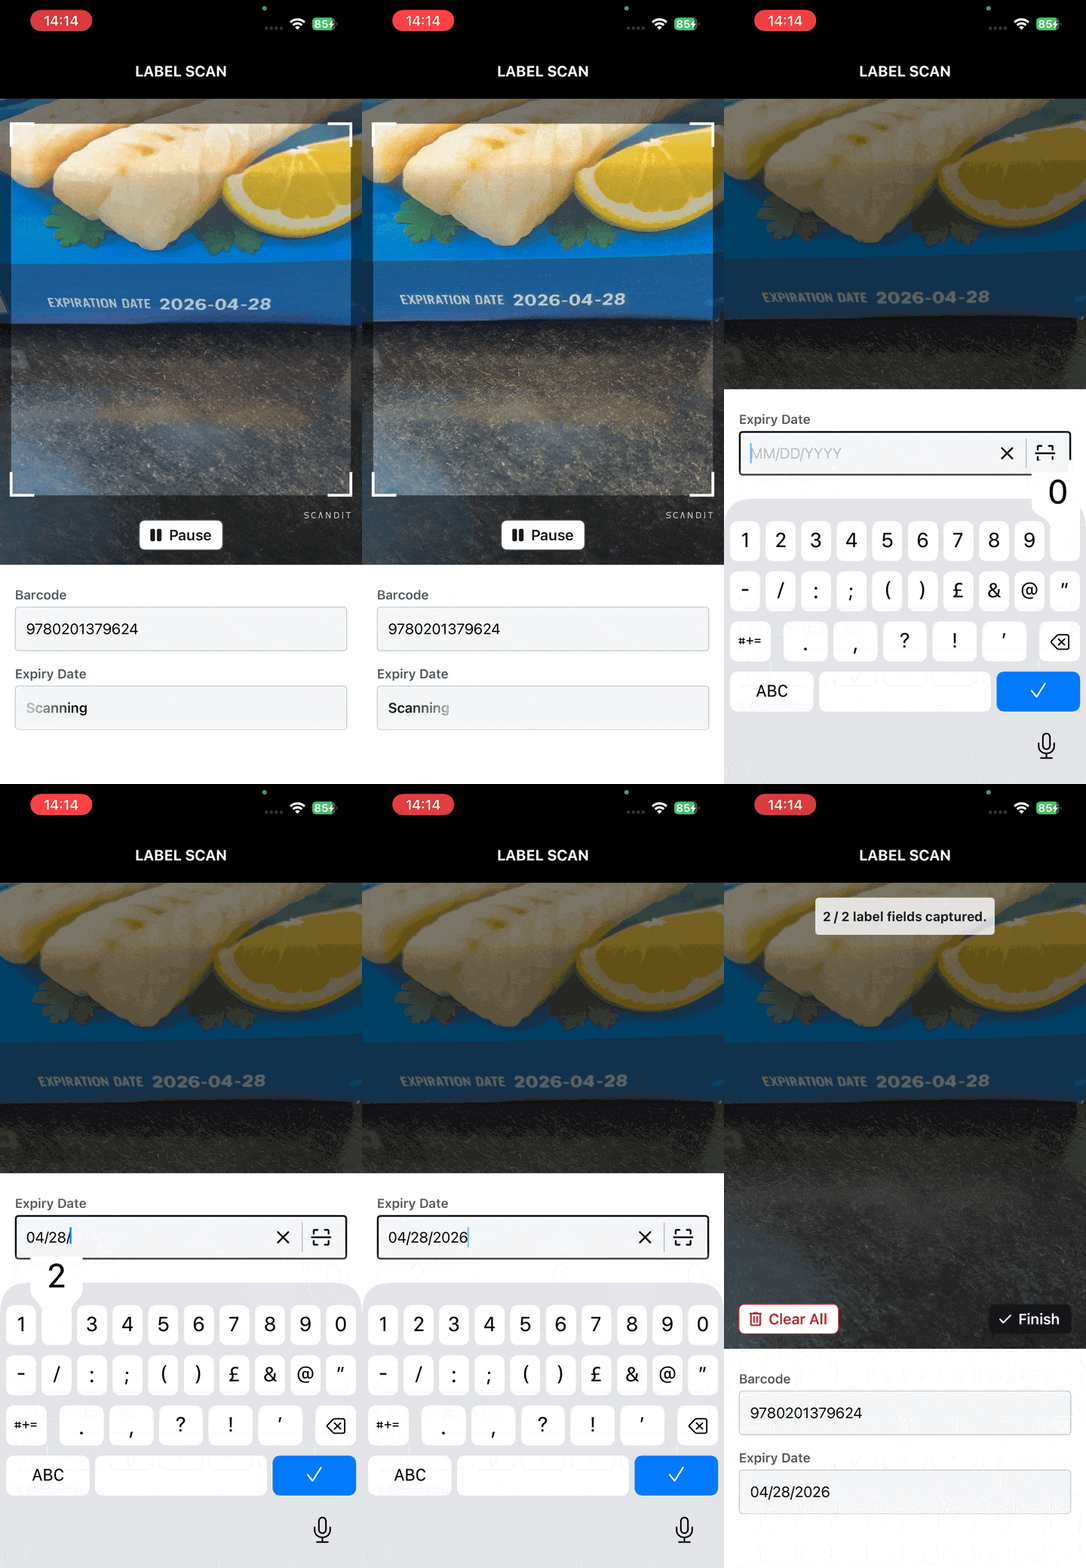 |
The field name in the label definition is used as the reference for setting placeholder text:
import com.kmp.datacapture.label.ui.overlay.LabelCaptureValidationFlowSettings

val validationFlowOverlaySettings = LabelCaptureValidationFlowSettings.labelCaptureValidationFlowSettings()
validationFlowOverlaySettings.setPlaceholderTextForLabelDefinition("<your-expiry-date-field-name>", "MM/DD/YYYY")

validationFlowOverlay.applySettings(validationFlowOverlaySettings)
Customization
All text in the Validation Flow overlay can be adjusted to match your application's needs. This is useful for localization, adapting terminology, or removing text entirely for a minimal interface.
Buttons
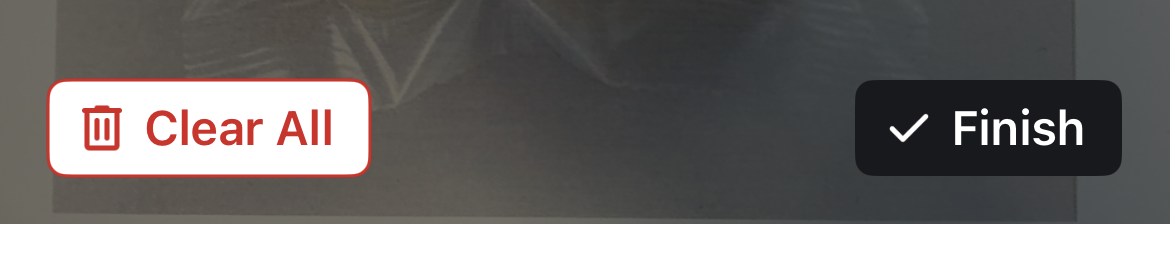
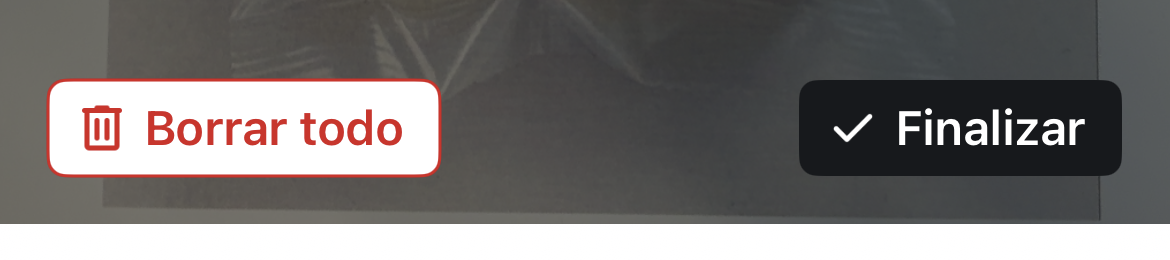
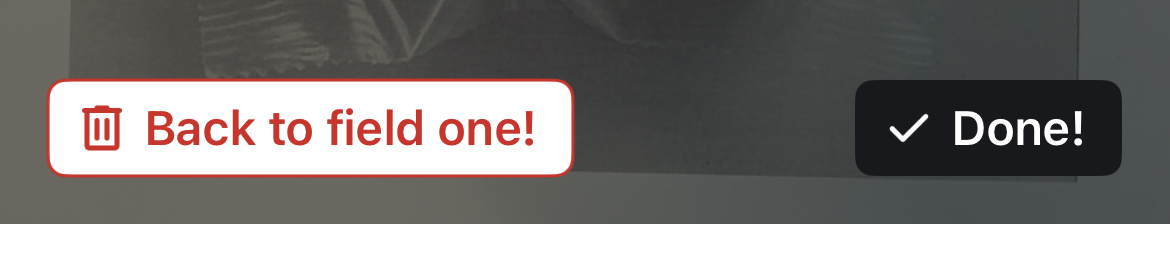
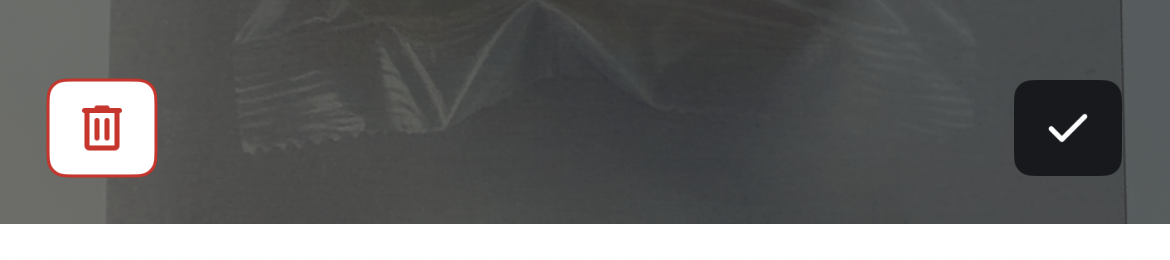
The text on the restart, pause, and finish buttons can be customized or removed entirely.
| English (Default) | Custom Language | Company Slang | No Text |
|---|---|---|---|
 |  |  |  |
val validationFlowOverlaySettings = LabelCaptureValidationFlowSettings.labelCaptureValidationFlowSettings()
validationFlowOverlaySettings.restartButtonText = "Borrar todo"
validationFlowOverlaySettings.pauseButtonText = "Pausar"
validationFlowOverlaySettings.finishButtonText = "Finalizar"

validationFlowOverlay.applySettings(validationFlowOverlaySettings)
Toasts
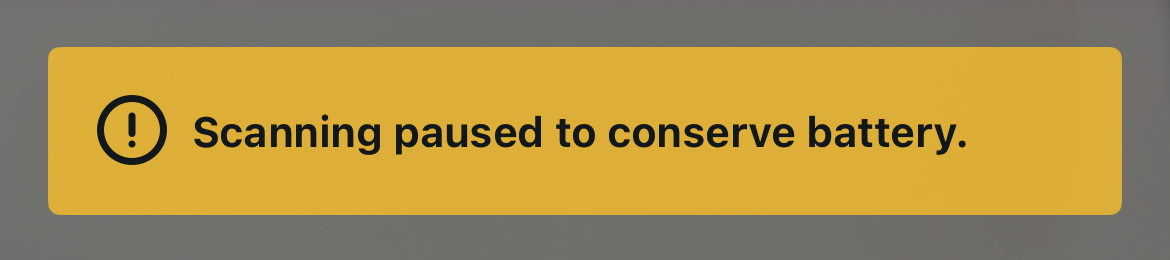
Toast messages appear at the top of the camera preview to inform the user about a scanning state change. The standby toast is shown when the camera is auto-paused after no label is detected for a long time. The validation toast shows how many fields have been captured so far after a scan.
| Standby | Validation |
|---|---|
 |  |
val validationFlowOverlaySettings = LabelCaptureValidationFlowSettings.labelCaptureValidationFlowSettings()
validationFlowOverlaySettings.standbyHintText = "No label detected, camera paused"
validationFlowOverlaySettings.validationHintText = "data fields collected" // X/Y (X fields out of total Y) is shown in front of this string

validationFlowOverlay.applySettings(validationFlowOverlaySettings)
Field
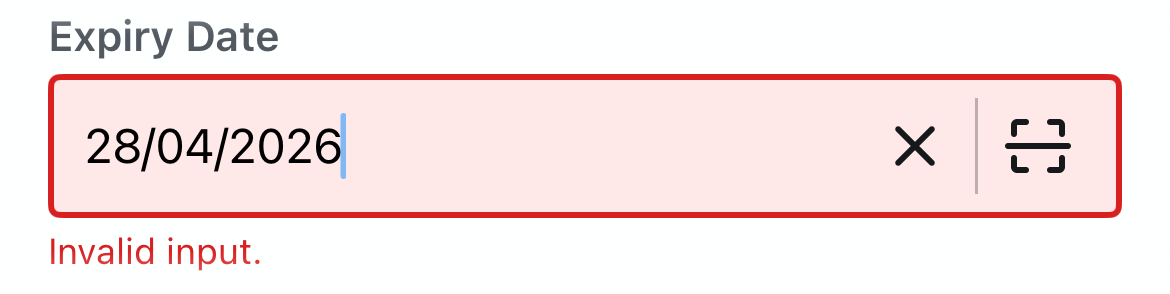
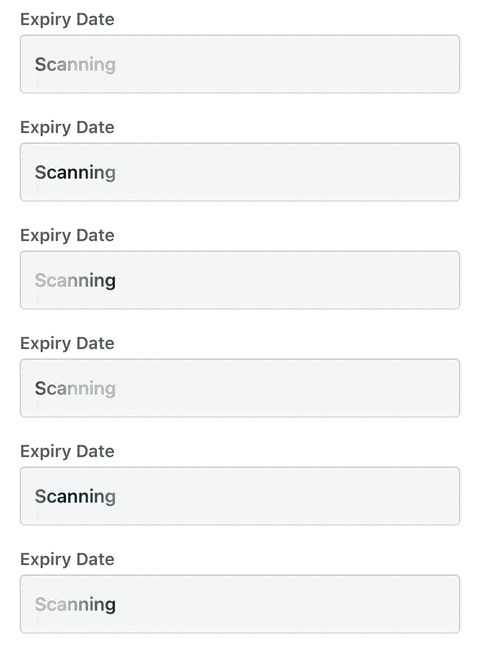
The field state texts are shown inside the input field itself during different phases of scanning.
| Invalid Input | Scanning Text | Adaptive Scanning Text |
|---|---|---|
| Shown when manual input does not match the expected format | Shown while the camera is actively scanning | Shown while cloud-based recognition is processing |
 |  | |
val validationFlowOverlaySettings = LabelCaptureValidationFlowSettings.labelCaptureValidationFlowSettings()
validationFlowOverlaySettings.validationErrorText = "Incorrect format."
validationFlowOverlaySettings.scanningText = "Scan in progress"
validationFlowOverlaySettings.adaptiveScanningText = "Processing"

validationFlowOverlay.applySettings(validationFlowOverlaySettings)
Cloud Fallback
The Adaptive Recognition API is still in beta and may change in future versions of Scandit Data Capture SDK. To enable it on your subscription, please contact support@scandit.com.
The Adaptive Recognition Engine helps making Smart Label Capture more robust and scalable thanks to its larger, more capable model hosted in the cloud. Whenever Smart Label Capture's on-device model fails to capture data, the SDK will automatically trigger the Adaptive Recognition Engine to capture complex, unforeseen data and process it with high accuracy and reliability—avoiding the need for the user to type data manually.
Enable Adaptive Recognition by setting adaptiveRecognitionMode to AUTO on the label definition. This is a single extra line added to your existing label definition configuration, using the DSL's adaptiveRecognition() member:
import com.kmp.datacapture.barcode.data.Symbology
import com.kmp.datacapture.label.adaptive.AdaptiveRecognitionMode
import com.kmp.datacapture.label.capture.labelCaptureSettings
import com.kmp.datacapture.label.definition.LabelDateComponentFormat
import com.kmp.datacapture.label.definition.LabelDateFormat

val settings = labelCaptureSettings {
    label("Retail Item") {
        customBarcode("barcode") {
            setSymbologies(Symbology.EAN13_UPCA, Symbology.GS1_DATABAR_EXPANDED, Symbology.CODE128)
            isOptional(false)
        }
        expiryDateText("expiry date") {
            setLabelDateFormat(LabelDateFormat(LabelDateComponentFormat.MDY, false))
            isOptional(false)
        }
        adaptiveRecognition(AdaptiveRecognitionMode.AUTO)
    }
}
Receipt Scanning
Receipt Scanning requires the Adaptive Recognition Engine, which is still in beta and may change in future versions of Scandit Data Capture SDK. To enable it on your subscription, please contact support@scandit.com.
The Adaptive Recognition Engine can also be used for receipt scanning. Unlike standard label capture, Receipt Scanning extracts structured data from receipts in the cloud, including store information, payment details, and individual line items.
Receipt Scanning uses a different integration pattern than other label types:
LabelCaptureAdaptiveRecognitionOverlayinstead of the standard overlay- A
LabelCaptureAdaptiveRecognitionListenerto receive the results
import com.kmp.datacapture.label.adaptive.AdaptiveRecognitionResult
import com.kmp.datacapture.label.adaptive.LabelCaptureAdaptiveRecognitionListener
import com.kmp.datacapture.label.adaptive.LabelCaptureAdaptiveRecognitionOverlay
import com.kmp.datacapture.label.adaptive.LabelCaptureAdaptiveRecognitionSettings
import com.kmp.datacapture.label.adaptive.ReceiptScanningResult

val adaptiveSettings = LabelCaptureAdaptiveRecognitionSettings.labelCaptureAdaptiveRecognitionSettings()
val adaptiveOverlay = LabelCaptureAdaptiveRecognitionOverlay.withLabelCaptureAndSettings(labelCapture, adaptiveSettings)

adaptiveOverlay.listener = object : LabelCaptureAdaptiveRecognitionListener {
    override fun onResultReceived(overlay: LabelCaptureAdaptiveRecognitionOverlay, result: AdaptiveRecognitionResult) {
        val receipt = result as? ReceiptScanningResult ?: return
        // receipt.storeName, receipt.paymentTotal, receipt.lineItems, ...
    }

    override fun onFailure(overlay: LabelCaptureAdaptiveRecognitionOverlay) {
        // No result could be extracted from this frame.
    }
}
ReceiptScanningResult contains:
| Field | Type | Description |
|---|---|---|
storeName | String? | The store or merchant name as it appears on the receipt |
storeAddress | String? | Full address of the store |
storeCity | String? | The city where the store is located |
date | String? | The transaction date |
time | String? | The transaction time |
paymentPreTaxTotal | Float? | Total balance before taxes |
paymentTax | Float? | Total tax amount |
paymentTotal | Float? | Total amount paid |
loyaltyNumber | Int? | Loyalty program identifier |
lineItems | List<ReceiptScanningLineItem> | Purchased items, each with name, unitPrice, discount, quantity, and totalPrice |